27 April 2011

Technique: Greenland vs CtoC rolling

It has been a few years since I have swapped my Euro paddle for an Aleut and Greenland one.
Some initial adjustment was necessary to my stroke to gain the maximum benefit from these new tools.
My forward stroke no longer needed to be so high and I had to learn how to cant the Greenland paddle to achieve a quiet and efficient stroke.
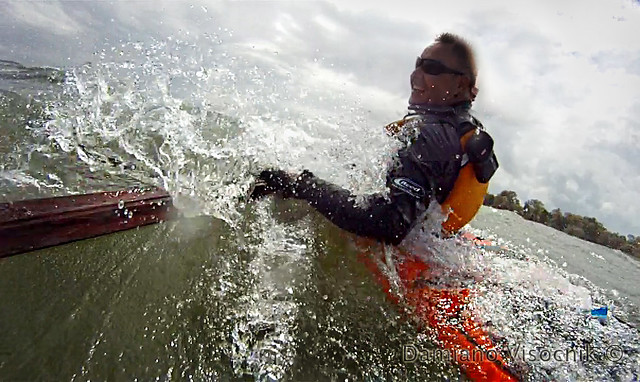
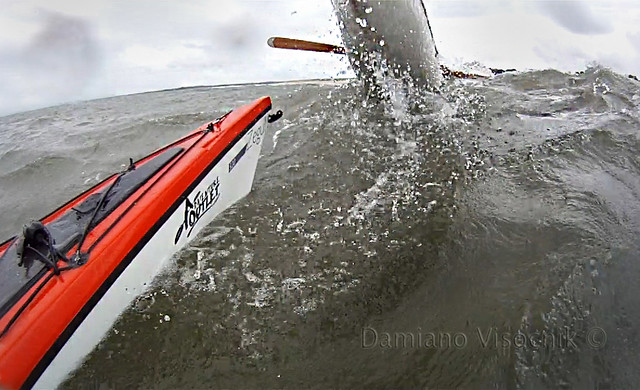
Eventually I started to venture into the surf with the traditional paddles and I now find them easier to use than the big bladed Euro.

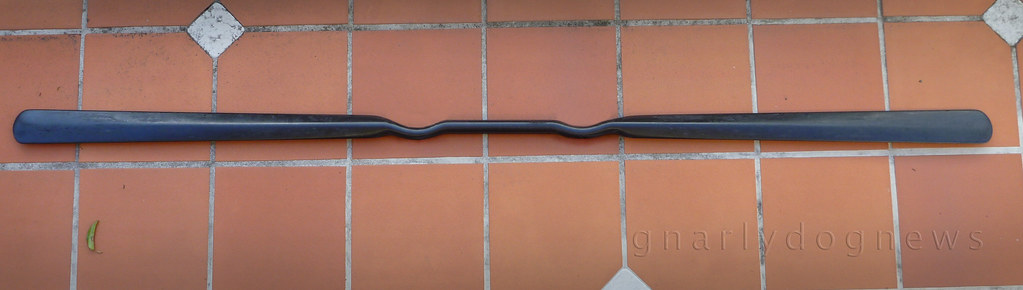
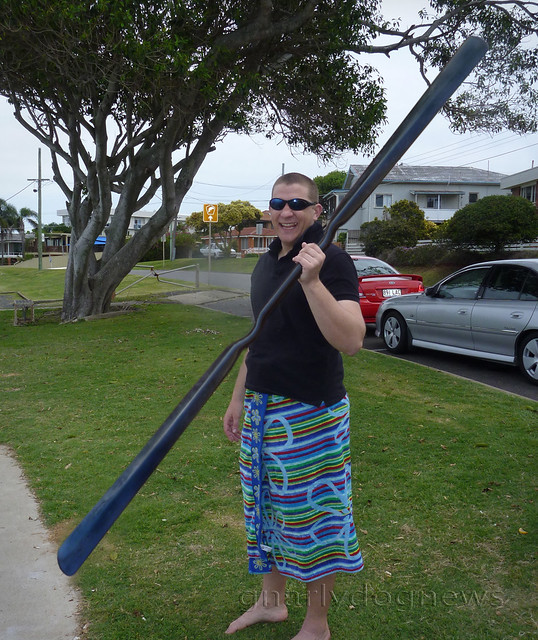
The biggest difference however came when I started rolling with a skinny paddle.
I was thought the typical CtoC kayak roll where the emphasis is on the blade and much less on kayak rotation to execute the roll.
Only now that I use traditional paddles I can notice the marked difference between a graceful roll and a forced roll.
The revelation came when a very proficient paddler, surf kayaker and roller could not execute a roll when handed one of my Aleut paddles.
Why could he not roll with my paddle when he was so good with his wing paddle?

I could not figure it out at the time but looking back at pictures of my style then and now I see what was happening.
bad roll_c

Sea kayak instructors all over Australia teach the explosive white water style roll where momentum and support from the paddle are essential.
Once I started to roll regularly with my new skinny paddles I looked at my rolls (video footage) and noticed a problem: my paddle would end up vertically before the kayak was rolled.
Through mentoring of the selfless dedicated self taught Greenland roller Greg Schwarz I started to correct my poor style and progress into a direction where body pressure on the deck/thigh braces of the kayak is way more important than pressure on the paddle.
Slowly I gained the knowledge and confidence to roll Greenland style. I watched a lot of videos and started to notice that all good rollers executed their rolls with such grace and finesse, never rushing and never forcing their rolls.
Since there is no formally qualified Greenland technique instructor in Australia most rollers are self taught.
While self teaching has great merits often leads to bad habits if one is not referencing his/her style to the one of the masters.
One such master is Helen Wilson. Her style is incredibly graceful.

Luckily for aspiring G rollers, Helen has produced an outstanding video that specifically looks at the technique of basic G rolls.
Her video might not be the most technically produced footage (some of the audio is rather erratic and hard to hear) but her explanation on how to execute Greenland rolls has helped me and my friends to correct some of our mistakes.
Helen Wilson’s video is available in Australia through :
Sydney Harbour Kayaks (NSW)
Blue Earth Paddle Sports (NSW)
Adventure Outlet (QLD)
and Fat Paddler direct for the other states.
I know that there has been resistance from some instructors in embracing the fast growing following of Greenland rolling but I assume that the reason behind is ignorance in the technique.
I have seen several videos lately where local kayakers have started to explore the use of the stick but are having the same problems I had myself: powering those rolls instead of finessing them.
It seems apparent that they are willing to try the stick but have not understood the fundamental difference between a white water roll and a Greenland Roll.
A well executed G roll will not show force or momentum. The emphasys is on controlling and rotating the kayak to come back up, not on the support offered by the paddle.
If a roll with a skinny paddle is marginal in calm waters it certainly will not work in the surf where aerated water will not offer enough resistance on the pressure applied to the paddle.
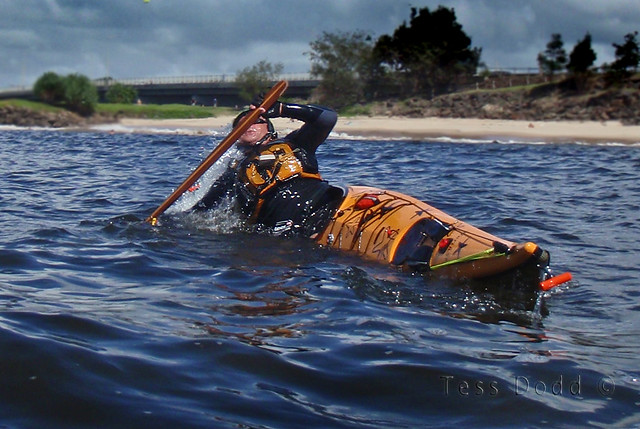
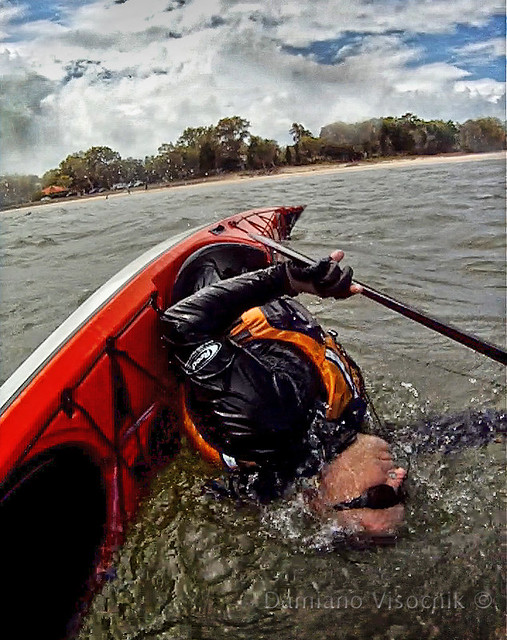
Some examples of forced rolls using a Greenland paddle:
how not to G roll_c
Adventuretess in her early rolling days

bad roll_7
source: Queensland Sea Kayak Club

bad roll_2

I am lucky to have a dedicated group of kayakers that mentor each other with rolling and criticize and correct each other’s mistakes with the goal to gain better boat control and overall performance out of our crafts.
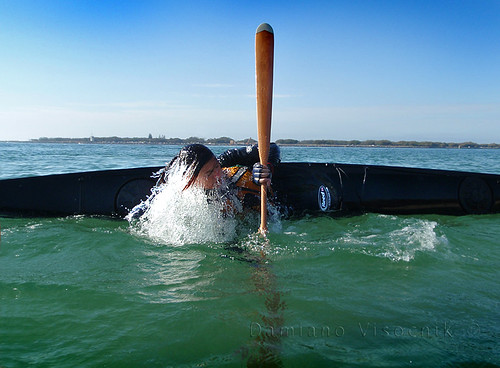
And here is Adventuretess a few months ago:

It looks like her style has improved...

PS Gnarlydog and Team are away on safari right now and will return to MEI Headquarter in early May...

19 April 2011

SHOP: modifying a Tahe Greenland seat and cockpit

Tahe Marine Greenland is one of the few production kayaks specifically designed for Greenland style rolling.
Very low volume and low rear deck allow for advance moves that in most other kayaks are much harder to perform. A low rear deck promotes laybacks where the paddler can honestly lay with his/her back on the rear deck.
Some paddlers find that the position of the seat in the Greenland is a bit too close to the rear coaming and that the back band is a little bit uncomfortable. When laying back there can be localized pressure on the spine against the rim of the coaming.

Below is an example of a highly modified cockpit of a Tahe Greenland, customized to the needs and body shape of the owner of the kayak.


The seat has been moved forward and the fabric back band has been removed.
Thin closed cell foam (minicell) has been added to strategic points to alleviate pressure on the pelvis bone.
The back band has been replaced by a custom made contoured fibreglass extension of the existing seat that is hinged for behind-the-seat access.


Located behind the seat is an electric bilge pump that allows quick removal of water that might have entered during launch in rough waters. The Greenland has very little freeboard (that's the nature of low deck kayaks) and launching on shores with waves can be tricky trying to avoid flooding. The solid backrest pivots on stainless steel bolts anchored into the coaming. The flanges of the cockpit coaming have been extended to allow for the seat to be moved forward.


The owner of this Greenland found the stock Tahe seat a bit short and not supportive enough for long paddles. He wanted more support under his legs and modified the seat with fibreglass "wing" extensions, padded with closed cell foam. He also modified the underside of the deck to create "cradles" for his thighs and have a more positive area for boat control. Perfectly shaped closed cell foam now engages his thighs exactly the way he wants it.
Visible is also a custom made under deck "glove box".


View inside the kayak showing supports for the seat extensions.


UPDATE 13DEC12
After receiving numerous emails asking for details on the procedure for the above mods, here are some additional images of work in progress.
P1130598
EPS foam plug in place of back band

P1130600
lay-up with carbon/Kevlar and fibreglass

.

15 April 2011

Photo: rolling Greenland style

Rolling Greenland style_c
No force, no rush, no splash. Just a gentle twist of the body with a bit of paddle support...
Slowly learning to finesse Greenland style rolling.

.

12 April 2011

SHOP: replacing the seat in Tahe Marine kayaks

Most hung seats in sea kayaks are manufactured using chopped strand fiberglass. And all hung seats made from chopped strand in my kayaks have cracked!
Incidentally I am not the only one with such problem.
Some manufacturers hang their seat from the cockpit coaming or the deck of the kayak.
This method allows for easy install and adjustment for fore and aft location with minimal modifications.

Valley sea kayaks have addressed the problem with a seat made of plastic that is much more resilient than chopped strand fiberglass.
I repaired my cracked seats by  removing them and adding several layers of quality fiberglass cloth and Kevlar in critical areas around the cheek plates. While not really difficult, it's annoying that seats are not structurally more sound.
I believe that the cracking problem is caused by the seat being able to swing side to side.
While foam packing under the seat does little to prevent them swinging, regular rolling and edging of the kayak induces the swinging. In reality all that is needed is to anchor the pan and prevent it from swinging.
A cheap retrofit solution to the problem is to use some sort of goop (I prefer the polyurethane type) to bond a small area of the seat to the hull. In the event of seat removal one needs to cut only the small section of goop with a kicthen knife.
However Tahe Marine kayaks has addressed this fundamental problem and prevented seats cracking.

Tahe Marine has anchored the seat with a factory stud set into the bottom of the hull and bolted the front of the seat securely. Tahe's seats don't swing and I assume don't brake (have not experienced or heard of it yet).
Zegul seat_4
seat in Zegul_the center bolt is covered by foam pad
Tahe's method however complicates things if one finds the need to relocate the seat.
I found that on couple of my kayaks the seat was too close to the rear coaming. In my SeaBird North Sea the seat was really close to the back preventing any chance of laybacks.
The kayak also leecocked substantially and since the cockpit is very long I was able to push the seat forward and adjust the trim. SeaBird Designs seat allows fore and aft adjustment.

In my Zegul 520 the seat was again very close to the rear of the cockpit. Despite a low rear deck I could not perform easy laybacks and my back would hit the coaming. The seat was also close enough to prevent  the install of an electric bilge pump behind the seat.
Zegul seat_3
no room for electric pump behind the seat
Unfortunately the seat is designed to sit in one location only. Moving it forward required modification to the seat.
I cut the seat's cheek plates and modified the front of the seat to align it with the floor stud but I still didn't like that version.
Since my butt is rather large (size 38 pants) I wanted something that would support my legs as well as and prevent the dead legs syndrome: the factory seat had to go.

I fabricated a new fiberglass seat taking the mould of my Impex kayaks. Those seats have proven to be of the perfect shape (even on long distance paddles) for myself and friends of mine.
I laid up a seat using tightly woven fiberglass cloth and epoxy, with Kevlar on the perimeter to prevent possible stress cracks. In the process of using less resin and stronger woven cloth (compared to chop strand)I saved a bit of weight. I had to create a little "well" where the stud is located so I could securely fasten the new seat to the hull.
Zegul seat_1
front of new seat_depression for fastener
I also eliminated the backband to further enhance the kayak's comfort. I no longer catch myself on it when rolling or reentering the kayak.
I now have enough room to install an electric bilge pump too.
Zegul seat_2
new seat with electric bilge pump behind it

Next article will be on customizing, not replacing a seat in a Tahe Greenland. Coming soon...

08 April 2011

Photo: surfing wind waves

Who said is no fun kayaking when the wind blows?
surfing wind waves_2
surfing small wind waves with a Vanstix.  20 knots it's ideal for this location

06 April 2011

GEAR: cameras_function follows design

I photograph a lot from the cockpit of a sea kayak. I believe in having a compact digital camera at hand to to capture dynamic shots, therefore I seek cameras that fit into the pocket of my PFD.
I understand that cameras that use a small chip (CCD) have limitations, even if manufacturers want to make the consumer believe that more megapixels will yield a better picture. Images produced from a compact will always be less sharp than a decent DSLR. I am fine with that. I seek images that depict the action of paddling, often in rough conditions. A DSLR in a waterproof housing wouldn't work for me.
For the last 5 years I have been using waterproof cameras that see a lot of exposure to the marine environment. My cameras usually get wet at least once a week, often stay wet for at least a few hours and are regularly rinsed in fresh water once back home.

Recent problems with one of my cameras ( I would like to keep the brand name undisclosed but users of that camera will recognize it) had led me to investigate a bit.
It appears that my problem is not isolated, actually quite common.
The manufacturer designed the shell to withstand water immersion and impact.
The core of the chassis is made of fibre reinforced plastic. To make the camera more appealing face plates of aluminium are covering the core.
Why aluminium? doesn't that material have problems in salt environments?
Well, aluminium comes in different grades and it seems that the manufacturer used a 7000 series that, while cheap to produce, has a terrible corrosion problem in salt water.
corrosion on rear_c
eventually stopped working; 6 months old
Different striking colors can be used for the anodizing of the aluminium plates that offer limited protection for corrosion, however bright orange, yellow, red etc. can be used to create visual appeal.
There is a prolific use of colored anodized aluminium in compact cameras these days.
The problems arise when the aluminium is used in marine environments.

While the manufacturer is very aware of the corrosion problem (on previous models) they insist in designing the new models of the waterproof camera with the same old aluminium plates.
The dirty part is that the manufacturer is NOT willing to honor the warranty when the cameras eventually fail due to corrosion.
corrosion on rear_2_c
In my case the corrosion crept into the button's contacts and, even though the camera never had water intrusion, stopped working.
I had a bit of a "heated" email exchange with the Hong Kong warranty dept. and eventually they warranteed my camera.
A reader of Gnarlydog News contacted me and had a different story.
The official Australian importer representing that brand refused warranty replacement to him claiming that the camera was not rinsed in fresh water within one hour after salt water use.
ONE HOUR!
Erin's camera_2
Erin's camera: used a couple of times, 3 months old!
C'mon. Real pictures are taken in real outdoors environments where rinsing the camera within an hour is totally impractical. To my reader I suggested to seek compensation under the "not fit for the purpose intended" claim.
The manufacturer can not expect that a waterproof camera that is designed for snorkeling should be washed within such short time.

To the manufacturer I suggest:
1)  drop the aluminium plates and use stainless steel or polycarbonate instead (other manufacturers are doing it)
2)  make sure that you design a camera that is fit for what you claim. Lab test are one thing, real world is an other
3)  honor legit warranty claims. You are doing more damage to the brand than the cost of replacing those few units that actually get used in the environment that the pretty advertising campaign suggests.

04 April 2011

Photo: rough water

When forecasted winds are in excess of 15 knots we head to a tidal flow that often delivers good fun.
Heading out into the waves can be bumpy.
tail surfing_4_c
 a bit too close for comfort... Zegul520 followed close by Nordkapp LV

01 April 2011

GEAR: prototype neutral shaft Greenland paddle

After months of design, test, redesign and a few headaches finally we have produced the first working prototype of a "neutral shaft" (aka as bent shaft) Greenland paddle.
bent stick_1_c

I used to paddle with neutral shaft Werner paddles and I wanted to try the same concept with my new found love: the GP.
The idea and execution is a collaboration between myself and a few close friends of mine.
The paddle is a foam core carbon reinforced shell. Unfortunately the first prototype is not as light as we hoped tipping the scales at just over 990 grams.
Once we are happy with the performance and design we will consider creating a mould to craft a lighter model.
On water testing went without a problem. After the initial few minutes of adjustment needed to locate the hands in the "well" the paddle sat nicely and a dramatic improvement in speed was recorded (this time I had to use a GPS even if I don't like the gadget).
Dreamer with bent stick_c
Dreamer after testing the new neutral shaft GP
I didn't want to post any close up picture of the paddle since we have applied for a patent and we don't want the industry try to rip our design off (see the case of the electric bilge pump).

Anybody seriously interested in commercially manufacturing the paddle should contact me at gnarlydognews(at)gmail.com